Open any photo or screenshot from the library's Image tab to mark it up: draw arrows and boxes, add numbered steps and text, blur private details, crop, rotate and adjust the colours.
Your original image is never changed. Your markup is saved automatically as you work, and Save a copy produces a finished picture.
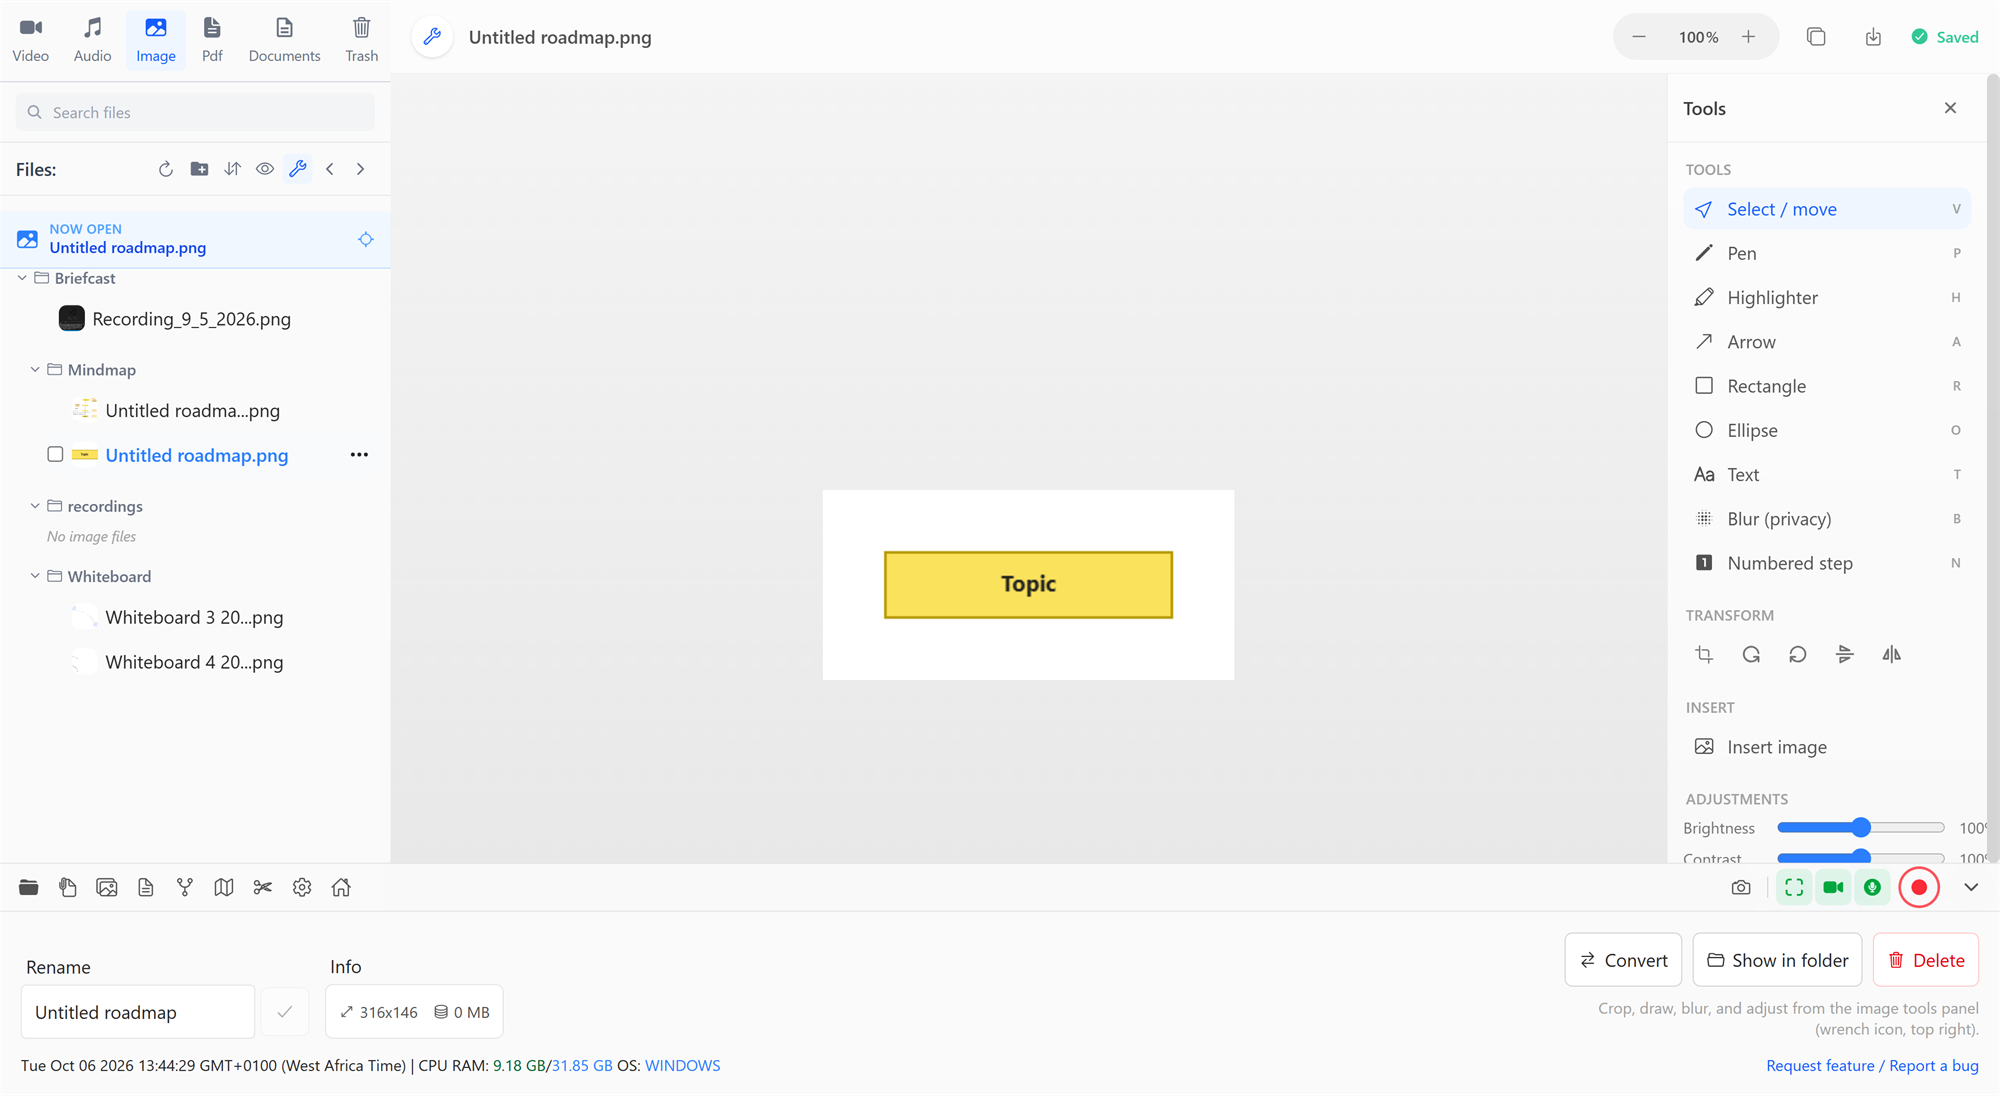
Tools
The Tools panel on the right holds everything below; the wrench icon beside the file name shows or hides it.
| Tool | Key | Use it for |
|---|---|---|
| Select / move | V | Pick, move, resize and restyle what you've added |
| Pen | P | Freehand drawing |
| Highlighter | H | Translucent strokes to draw attention |
| Arrow | A | Pointing at things; can be dashed or have a head at both ends |
| Rectangle | R | Boxes, outlined or filled |
| Ellipse | O | Circles and ovals, outlined or filled |
| Text | T | Labels, with size, bold and an optional background for legibility over busy images |
| Blur (privacy) | B | Hiding emails, names, faces, passwords |
| Numbered step | N | Numbered markers (1, 2, 3…) for step-by-step guides |
Choose colours and the stroke width in the toolbar.
Blur vs. redact
The privacy tool has two modes:
- Blur softens the area. It looks natural, but it's not guaranteed to be irreversible.
- Redact covers the area with a solid box. Use this for anything truly sensitive, such as passwords, ID numbers or bank details.
Adding images
Click Insert image in the Tools panel, or paste one (Ctrl+V), to place a picture on top of the photo, for example to build a side-by-side comparison or add a logo. Select it to give it rounded corners, a border or a drop shadow, or to crop it.
Arranging
With something selected:
- Bring to front, Bring forward, Send backward, Send to back.
- Duplicate (Ctrl+D) and Delete (Del).
Undo (Ctrl+Z) and Redo (Ctrl+Shift+Z) cover every change.
Crop, rotate, flip
- Crop: drag the frame to the area you want to keep.
- Rotate left or right by 90°.
- Flip horizontally or vertically.
Adjustments
Brightness, Contrast and Saturation sliders, with Reset adjustments to go back to the original look.
Zoom
Ctrl+= and Ctrl+- zoom in and out, or type a zoom level.
Saving
Save a copy writes a new PNG named <original name> (edited).png next to the original, with everything flattened in. It's ready to share or paste anywhere. Your markup stays editable in Briefcast, so you can come back and change it, then save another copy.